For a number of years, I thought it was not feasible to connect external propane sources to our 2007 Airstream Interstate Class B camper van. Several years ago, we dissected this issue in a lengthy and detailed Air Forums thread titled "Carrying extra propane--2006 T1N Interstate Parkway" (the Parkway was a contemporaneous short-lived model produced at the same time as first-gen Interstates). At that time, we concluded that we just didn't have the clearance required to plumb the correct fitting on our tightly-configured vans.
See the measuring tape at top right? Too tight to do anything useful with that space.
And by "us", I really mean my husband, who invented this approach I describe below. Rather than trying to install a fitting AFTER the freakin' OEM propane regulator, as we had originally aspired to do, he figured out that we could tap into the T-fitting that we abandoned when we removed the original Dometic propane fridge and installed a compressor-driven Vitrifrigo instead (see this other post).
The sequence goes as shown in the scribble images below. I have referenced the corresponding part numbers as those parts were found at Lowes hardware store in February 2021. Note that there are probably more elegant ways to plumb this thing, but in our electrical grid failure emergency, a lot of supplies were sold out, especially items relating to alternate energy that people were trying desperately to cobble together at the scale of their households.
This is the view underneath the van, looking up at the chassis. There you see the T-fitting and where the new line is connected to the existing propane distribution system under the van. TAP TO EXPAND EACH PHOTO FOR PROPER RESOLUTION - I'm still using Blogger which is an obsolete platform and embedded photos are downsampled.
There's the other end of the line shown in (1), with the protective plug (black) still shown in the quick disconnect fitting.
This just shows how that line snakes from the T junction amidships back to the rear end of the van where the terminal quick-connect is located.
There's the quick disconnect (QD) hooked to the line that runs to the peripheral propane supply.
The line connecting to the 20-pound external propane bottle.
As I said, there are probably more elegant ways to achieve this, but this seems to work. For safety, I will be leaving that yellow valve shown in (1) closed except when we need to be operating off an external propane bottle. That means crawling directly under the center of the van to close that valve, but I'm used to that.
And the reason why we worked to finally get this achieved, after all these years of van ownership?
Because we have an upright freezer filled with hundreds of dollars of home-made organic meals. If we don't find a way to save that during the rolling black-outs that we were told were going to be 15 - 45 minutes each but which actually lasted, OH, ABOUT 52 HOURS!! the first time, it would really represent a loss because it's not just the cost of ingredients - it's hours and hours of our time to prepare and freeze all that stuff for future travels. So now we have the option of running an extension cord from our Interstate to our house, and powering our freezer off our Interstate's propane generator. We couldn't do that previously because the onboard propane supply is insufficient to meet that kind of load (the onboard tank is very small). We needed an external source, with propane bottles we could swap in and out at will.
Here's music to my ears in this demonstration:
POSTSCRIPT: This post focuses on a project that we frantically undertook in an effort to save some of our food. It doesn't say much about the plight of our 30 million fellow Texans. Here's an image reflecting some of the extent of that, a small ode to a population that has suffered immensely this week:
Every good project starts with an inspiration photo. This cluttered and inefficient image from last summer was mine:
Dog be like, "Whut??"
That photo shows the laundry drying under the awning by being stuck to the side of the van with individual magnets. And it shows a wilderness-built cooking table (which should be kept next to the fire pit) being used to hold what our little folding aluminum camp table is too small to accommodate.
You might wonder why, in an infinite sea of trees, I'd choose to stick laundry to the side of the van for drying. Well, in that part of the world, rain showers come frequently and without warning. It is simply more effective to stick it under the awning where I do not have to worry about it getting soaked unexpectedly.
I decided I would build a sideboard to serve both of the identified needs - to provide more storage for pots, pans, drinks, condiments, etc. during meals, and to double as a drying rack for laundry.
Consistency is NOT the hobgoblin of little minds, thank you.
Here's a photo tour of this project, including sourcing.
That's the spec on the one-eighth aluminum, which I got in a 1' x 2' sheet from Online Metals.
Given that this device was intended to hang on the exterior side of the van, there were a couple of unusual operational considerations.
First, the sideboard had to be strong enough to support at least 10 pounds of stuff without either falling off or skidding down the side of the van under the weight. To support the main mass, I used the same "skyhook" magnets as I had found to be effective for the awning screen surround that I designed a few years ago. These are rubber-backed and, as long as you observe good neodym hygiene, your scratches should be minimal.
By "hygiene" I mean, do NOT leave these things lying around. They will pick up every speck of magnetize-able dust and every iron shaving that they can find within about a one-mile radius. It's not really the magnet itself that has the potential to scratch your paint - it's what gets trapped between the magnet and the van. They have to be kept very clean, which is a challenge given the power they exert on their surroundings.
The pictured object is a Master Magnetics 7580 Magnetic Hook Organizer, which has a 65 pound pull force. The quote is from someone's hacked Wonka transcription.
The hooks look like this in application - just a simple knotted loop to keep the suspension lines in place.
That's a brother from another mother in the reflection above the hook - an Amazon delivery Sprinter with its headlights on.
Second, obviously I could not have a bare cut aluminum table edge bumping up against the side of the van - that would be a disaster for the paint. The body contact had to be with a soft non-abrasive surface. My husband and I first used a jigsaw to round the corners of this sheet (for visual consistency with the Lagun table) and then I edged in in Dritz 1" charcoal gray polyester belt webbing, which is the same treatment I had given to the Lagun top (belt webbing has about a million uses in a van).
Third, for similar scratch-prevention reasons, I could not allow any suspension hardware to touch the van, so it had to be inset. The beauty of perforated aluminum is that it provides an infinite number of possible configurations without the need for drilling holes.
I used one of those D-rings inset into each rounded corner. In order to make for easy assembly, disassembly, and storage, I decided that the suspension lines needed to be detachable, so I used Strapworks' half-inch miniature bolt snaps at the four corners. The tiny bolt snaps will remain connected to the lines at all times, whether in use or in storage.
My suspension lines are made of orange paracord. In the realm of artistic design, ordinarily one might not choose to combine orange with the garnet color of our rig's side stripe - those two don't necessarily go together. But the orange design element was already present in the form of reflectors and the signal glasses on the van. If you can't beat 'em, join 'em - I ran with safety orange in getting an CG Gear sand-free mat (I cut an 8' x 8' into two halves and re-edged the cut seams, also with belt webbing) and in using the paracord. I also like the photo ops that this combo provides in cross-referencing camp fires.
Best orange ever. Orange accessories would have made for a nice photo with this, if I'd had them at the time it was taken.
Getting those lines the correct length took a long time and many careful iterations. The van body is curved, plus in my driveway it was parked on a slope, so it was basically impossible to get it level in situ.
Nice try, but too many variables to be useful.
I achieved level by hanging it on the side of my upright freezer and working on it there, given that the freezer was more conveniently plumb and level.
In order to keep the table from slipping fore and aft when it hangs on the side of the van, I used orthogonally-magnetized neodyms as "keepers" on the edge of the sideboard that fit into the van's lateral body groove. By this I mean, the north and south poles of the magnets were oriented out the sides, not out the top and bottom face as they typically are.
See the little red and green cartoon at the upper right corner? That's what I mean.
Image from KJ Magnetics.
I needed two of those 2-hole countersunk block magnets to stabilize the edge that was up against the van body. For better and for worse, each of those blocks has a 17-pound pull force (smaller ones were not available with sideways magnetization). Trust me when I say that this table is not going anywhere. I could probably drive at freeway speed with it in place, having 2 x 64-pound suspension hooks and 2 x 17-pound lateral stabilizing magnets on it!
Here's what one of those countersunk blocks looks like in place. Note that the edge of the table snugs into the Sprinter's body groove, as I mentioned above. That allows the side-mounted neodym block to get close enough to grab the metal, but the majority of the force is exerted by the web-woven table edge, to minimize scratches.
Fun blog post for me, as these materials are so photogenic.
Here are a couple of money shots of the table in place.
Dinner is not yet served, but it will be.
Yeah, I can support all that weight, baby. Bring it!!
The sideboard is easy to reach from those "butt bucket" REI camp chairs (aka Flexlite chairs) that we typically carry lashed underneath our under-cabinet suspended shelves:
Yup, I can reach it easily.
When it's time to dry laundry, I simply raise this sideboard up and suspend it from the top of the van body.
Much better looking than having individual pieces of clothing strewn all over the side of the van. More effective for drying, too.
It was windy when that photo was taken; you can see the clothes being blown forward a bit. I'm using well-rated folding travel hangers for this hanging purpose. The points do not insert into the perforated aluminum holes, but they do catch in the edge of the holes, so in light winds, they won't blow off.
How often do you see 5 stars anywhere on Amazon?!
The sideboard's drying utility is not just limited to hanging. Because the perforated aluminum is 40% open space, socks, gloves, etc. small items can be dried on top of it while the other items hang underneath.
When I raise the sideboard up high as shown above, the countersunk neodym side magnets will no longer touch the van's steel side body because the windows sit proud of the van. I solved that issue by using a KJ Magnetics plastic-coated disc as follows, in order to keep the sideboard from swaying in the wind (the clothing could act as sails) and potentially scratching the windows:
The neodym black disc attracts to one of the two lateral magnets, which is enough to stop it from moving around.
We used Slide-co spring-loaded mirror clips to mount this table for storage. At long last, I have something to break up the monolithic appearance of the butt end of this galley cabinet. I've always found that orange atrocity to be a visual distraction. With its Lagun table big sister hanging nearby (the Lagun top stores on our wet bath door), the sideboard looks like it was intended to be in this space all along. The space finally appears visually coherent and complete.
Close up:
Almost no other object could be stored in this space due to the sliding door clearance issue. But this sideboard fits perfectly.
You'll notice that I detached the suspension lines and hung them a few inches right of this sideboard for storage. The two neodym suspension hook magnets are right above them.
Next will come the off-grid road testing of this new asset, but our big trip won't be for a few more months. All of my current projects are in preparation for returning to this little piece of paradise:
After more than four years of Airstream Interstate Class B campervan ownership, I am routinely amazed that I can still discover new modifications that result in large efficiency gains. This is one of them - a valuable capture of roof space that has historically been underutilized.
When I first posed this question to Air Forums Sprinter and B Van Forum, I was envisioning perhaps mounting a storage device in the space shown, using the referenced clamps. My solution turned out to be even simpler than that.
I found a storage device that fit this space like a glove, but it's not what I had originally envisioned.
I used one of my favorite products as the underlayment on the roof, to allow for air circulation and drying, so that the ATV bag would not trap moisture next to the metal.
Bonus with the Taskmaster: it could be pulled off the roof and used as a traction assist device if I ever got stuck. I used a third of one of these mats to underlay the ATV bag, and I'll probably find another reason to put the other two thirds up on the roof eventually.
Here's what the ATV bag looks like positioned to fit:
It covers the raw open end of the solar panels on the rear end, giving it a more finished look.
I mentioned above that I didn't need to use the referenced clamps that I originally thought I would need. Given the way the thing butts up against the 8020 solar panel frame, and given that existing hold-down straps were mounted on the bag in key areas adjacent to the frame, I decided to use screw eyes instead. My husband sourced stainless steel eyes and also bolts that were compatible with the 8020. With those in place, I simply attached the bag using 175 pound zip ties. Here are a few pics.
Eye bolted into the underside of the 8020 solar frame, right next to one of the carrier clasps.
View underneath, showing the zip ties connecting the eyes to the existing bag straps.
Gratuitous pic of dog in the process of solar recharging.
Detail of how this attaches:
(1) The bag is attached to the Taskmaster rubber underlayment mat using the straps that would typically attach it to the back frame of an ATV.
(2) The rubber underlayment, in turn, is attached to the roof rack using 175-lb zip ties. This commercial grade rubber mat is extremely strong and it would take tremendous force to rip through it (these mats are so tough that one of my professional clients uses them in a petrochemical plant application). I don't anticipate any issues with it.
(3) The upper edge of the bag is attached to the solar 8020 frame.
Like this.
Now, you may be wondering two things. First, what the heck do I put way up there?
Answer: Necessary junk that would otherwise consume valuable space inside the van. Nothing expensive that it would hurt to lose if a thief got his nosy self up there (which is unlikely).
Like these painting supplies for a renovation project we are working on. I'm transporting the paint itself, 3 gallons worth, inside the Yeti that this is sitting on. I don't want paint inside the van.
Secondly, how the heck do I get up there to load and unload the bag?! It's ten feet in the air!
Using my Telesteps 1400E, ladder of a thousand uses, which I have secured to the hitch platform.
I have a dedicated very-tight bungee so it won't slip. And if I'm really struggling with anything in the bag, I can also bungee the top of the ladder to the roof rack itself for added stability.
The hitch platform is covered in non-skid tread, plus the ladder is secure. It's actually safer in this configuration than it is when I'm using it on open pavement.
Anyway, I'm delighted with this mod. Glad I found an appropriate bag to create this most unlikely combination.
As regular readers and some online forum participants know, I just completed a trip that spanned six thousand miles and lasted just a few days shy of a month (my conventionally-employed husband joined me for two weeks of it).
In terms of geography, this was similar to the trip we did last year, but strategically it could hardly have been more different.
It's an absurdly long drive, and it transits some of the most difficult corridors in the country. I drove up solo, taking five days to do it (sanely restricting myself to less than 550 miles per day). My husband flew up to join me mid-way through the adventure, and we drove back together, clocking as much as 760 miles per day with two drivers.
Rather than traveling strictly for leisure this time, I was intent on combining work, family, social functions, and property development.
That's exactly what it is - a piece of dirt - which is why it conjures for me the Los Lobos classic "Good Morning Aztlan". Earlier this year, in preparation for this trip, I hired a contractor to improve the access to a lakefront parcel that I had owned for decades but completely neglected for all of that time. This is a drone shot of our rig parked on the boondocking pad that resulted from that effort (see this earlier blog post titled "Stumbling toward a new summer cottage paradigm.")
With those differences in mind, here is my lesson listicle, interspersed with pretty pictures for contrasting effect.
Like this one, for instance.
1. It is easy to live a conventional life. It is easy to live a van-based boondocking life. It is surprisingly difficult to combine the two.
The principal challenges revolve around hygiene and issues of functional efficiency. There's a reason why women never entered the paid workforce in large numbers prior to the availability of major appliances such as washing machines, dryers, dishwashers, vacuum cleaners, as well as public infrastructure such as running water, centralized sewer or septic systems, etc. Basic human maintenance tasks consumed a disproportionate amount of their time and energy before those conveniences, and the same is true of boondocking. If we were simply camping in the woods vacation-style, we could afford to make perpetual slobs of ourselves, but we ended up participating in at least four family get-togethers (most of which did afford access to a shower, thankfully) plus three unrelated social gatherings inside of two weeks. Trying to maintain a state of cleanliness and grooming on par with the rest of society even as we were chain-sawing our way through a dense spruce forest in the absence of running water was basically impossible, and even the partial effort ate up way too much of our time. Sometimes the contrasts felt a little absurd. For instance, we had a ten-year anniversary portrait taken about an hour after the both of us washed our hair and bodies outdoors using water boiled in our Kelly Kettle.
This Kelly Kettle. It works when it's not raining out, but it takes time.
It can be done, that struggle for basic cleanliness, but it gets tedious quickly.
But of course the upside is that we got to see the likes of this as a routine matter of course.
2. Don't underestimate the intensity of the culture shock associated with remote boondocking.
In short, ...
That's Houston's Katy Freeway on the left, and a higher-altitude drone shot of our boondocking property on the right.
I've lived in both of these depicted places, plus, I believe I'm more adaptable than the average person. Despite these things, the transition still proved to be surprisingly challenging for me, in part because I was unable to set up cellular access to do proper work despite having hired Technomadiato get me prepared for that aspect of the trip. Every time I turned around, there was some other routine task of life that I could no longer do, and new reasons why I couldn't do it. I was fighting to achieve what typically comes naturally and automatically, and it became a bit discouraging at times.
All directionally dressed up in the wilderness, with almost nothing to receive. The evidence we collected suggests that it was primarily the fault of the local cell provider. Technomadia probably specified all the right equipment, but the local alien gremlins simply didn't seem to be transmitting sufficiently well.
3. You might want to plan a separate vacation, because this type of trip won’t be a vacation.
Anyone who owns a second home knows that there's a lifetime's worth of work that could be done on both of their properties. Ours is no different. The land doesn't currently have any building structures on it, and the access road doesn't require any work obviously, but the young growth spruce forest has run amok after decades of non-management, and at the very least, we needed to establish lake access, which is one hell of a job just in itself. We brought a new chain saw with us and it worked fabulously.
As work goes, this was difficult to resist. We knew that there was a million-dollar view lurking behind all those spruce trees, and we were determined to uncover it. The boondocking pad is perched on a ledge above the lake, and so it's not just a little sliver of lake that is visible - it's a whole panorama. We managed to open up this one keyhole view for now. That's my husband down there for scale, standing in the gap after felling the final tree.
But it was too easy to let work consume the entire day. There were times when I just had to say no, I don't care how close we are to finishing - there can simply be no work done today. Otherwise we're going to leave here exhausted with no quality experiences to show for it, just a memory of work, work, work, like we never even left our primary home.
Our dog agreed - we needed to spend time relaxing, sitting around the campfire, admiring the sunsets, and exploring the lake by kayak.
Upon concluding the trip, I feel even more strongly about this. We need to have one to two weeks a year where we simply don't lift a finger for any reason. Next year, we might fly for a separate trip in which we just hike, relax, indulge ourselves, and hang out. Then perhaps take the van knowing in advance that it's not going to be "the" vacation. Life is all about expectation management.
4. There will always be unforeseeable problems, no matter how carefully you plan.
I spent weeks going over that damned van with a fine-toothed comb before I left, and still, this happened.
Oh, how very special - I stopped on a one-lane bridge to take a quaint photo, only to notice that I'd blown a headlight, which I then had to proceed to locate and install myself in the middle of nowhere. Fortunately there's a retail phenomenon up in that area called Canadian Tire, and my husband was able to walk me through the procedure by cell phone.
And then this next thing happened - the Fantastic ventilation fan shorted out and started every erratic behavior known to mankind, which woke me at night repeatedly, contributing to fatigue and a shorter-than-usual temper on my part. I got around that problem by leaving the raise mechanism on the manual setting even as it tried valiantly to lower itself using its motor (my husband speculates that the rain sensor went bad) - I just let the damned motor grind away for hours at a time when I needed to use the fan (Airstream Interstates were not designed to ventilate passively - the fan is absolutely required for air flow). Fortunately it didn't catch fire during all that motor-grinding. The rain sensor and the motor are both getting de-installed as soon as I can find the time to do it. More automation = more things to simply break. These things are not conveniences - they are just liabilities waiting to happen.
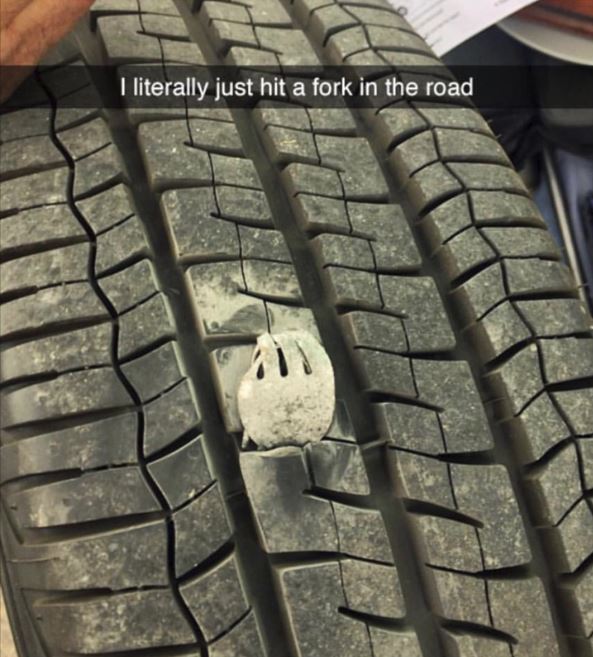
And then this next thing happened.
Two tires spontaneously flattened 25 miles from civilization, due to faulty valve stems. See this Air Forums thread for a discussion.
Now there's a sight you never want to see while on "vacation" - your rig on jacks at a tire shop. I had the two totally-failed valve stems replaced in the field on an emergency basis (Good Sam travel insurance saved my bacon), then drove directly to the nearest civilization (Sydney, NS) to have the other two replaced preemptively. More quality time wasted.
Well, metaphorically, yes I did. But the other tire problems were caused by bad valve stems rather than forks.
And then this next thing happened - we broke an air seal somewhere in the black tank system. I can't yet imagine where, because we had already replaced and hardened the vent line. We could still use the system just fine, and there was no evidence of liquid leakage, but some seriously abnormal odors developed, and I'll report back later on the troubleshooting.
In sooth, there will always be problems. I was hoping that I had cut all incipient degenerative conditions off at the pass prior to leaving on the trip, but obviously I was mistaken.
5. There may even be full-blown catastrophes.
There wasn't a catastrophe at my remote location, but it was very disorienting to watch Houston undergoing major destruction from Hurricane Harvey's flooding. I had left the city under a benign blue-bowl sky, and a few days later, its very future - the future of my home city - was suddenly placed in doubt.
The National Weather Service needed to almost double the range of the color scale to reflect the amount of rainfall received during the wettest hurricane in recorded history.
That map above is not fully accurate. Our neighborhood received at least 48 inches of rain (according to the local Wunderground stations) but shows as having received less. For a while, we knew that odds were not better than 50/50 that we'd keep our house, despite being outside the 500-year flood zone (don't even get me started on that bunch of pseudo-scientific bunk that the federal government uses to define such things). As it turned out, our house did not flood, thankfully. But it was very hard watching this happen to Houston, hearing about friends and professional associates flooding one after another after another, their homes destroyed and their lives up-ended without warning.
An Instagram image I developed to illustrate the surrealism of watching the experience from afar. I was using my kayak to explore a peaceful and beautiful lake even as some of my fellow Houstonians were using the same popular brand of kayak to fight for their lives in the flooding.
6. Go big or go home (aka it all has to work right).
The central nervous system of every camper van is its electrical system. In the time between last year's trip and this one, my husband designed and installed a lithium battery system for our van, to replace the old single-cell AGM Lifeline battery (very lengthy Air Forums thread here). An enormous amount of work went into that effort and many thousands of dollars. But if you are going to live off grid (not just vacation off grid), you will find that you have no choice but to do it right. You won't be able to cope with the demands of life if all you've got to work with is the half-assed electrical system that your van was sold with, if it's an Airstream Interstate, at least. Unless you own a cutting-edge new rig by one of the producers that is striving to make lithium standard, you're going to either need to DIY a system, or hire out an electrical upgrade. Don't think you'll need to use a microwave oven or toaster or hair dryer or coffee percolator off-grid? Trust me - you will. Your system must be capable of handling those normal everyday types of needs.
Our power control center, all home-made.
I could not have done this trip without this touchless, self-sustaining electrical system. I simply could not have lived off-grid for almost a month without this system. It would not have been physically possible with a lesser design. There were enough other simultaneous challenges (see items 1, 2, 4, and 5 above, plus other challenges that I'm not listing for brevity) that I simply could not have dealt with a substandard electrical system on top of the rest.
7. Go small or go home (aka if you think you’ll need something, you’ll probably need it doubly).
If you flip back through the pages of this blog, you'll note that I expended an astonishing amount of effort on minor van tweaks and projects designed to increase readiness for this trip. I don't regret a single dollar spent or a single item created. I used every bit of it, and wanted for more, specifically the following, in rough order of importance and urgency:
We need rear air suspension for the van (more on that later).
A USB charging outlet needs to be added at the rear curb side of the van.
I'm thinking very seriously about an upgrade to an efficient tankless water heater, for those boondocking days when it's pouring rain and I can't fire up the Kelly Kettle. The existing water heater is grossly inefficient and not compatible with a longer-duration boondocking paradigm.
The OEM window screens need to be done over in no-see-um netting rather than mosquito screen. Whoever designed those things had no clue what life is like in the south.
I need to add a second closet shelf above the folding bike.
More interior gear-lashing points would be helpful.
Minor point, but the wine glasses would be best mounted under the spice rack. Every single space-maximizing conversion counts in the grand scheme of things.
I ordered a second Infusion Living silicone water bucket. I had a cheap folding camp bucket (the one that looks like this), but it kept collapsing spontaneously and spilling the contents. Those silicone and stainless steel buckets are expensive (about $30 each), but absolutely worth it.
The blue one shown here at bottom.
I also ordered a second GSI original Fair Share mug (shown in the bucket). That thing has ten uses.
I'm sure more will come to me.
It was a lot of work, creating and assembling all those van accessories over the months leading to this trip, but I can relax knowing that the work is largely complete now, and all ready for the next trip. I won't have to invent no-see-um awning enclosures or kayak carrying devices or any of the other items going forward. It Is Done.
The ability tocarry the inflatable kayak on the van roofwas essential to the quality of this trip. There was one morning in particular where the dog and I took the kayak across to the other side of the lake and discovered a mysterious old logging road that we hiked for over a mile.
8. Plan for expansion outside your boondocking rig in all but the most arid climates
If you read Instagram and keep up with the #vanlife posts, then you know that it never, ever rains on Instagram. There is never any foul weather or adverse conditions - bad weather simply wouldn't dare to occur. Well, that's Instagram, and this is what real #vanlife actually looks like:
We need to put in some kind of a small shed or perhaps a home-made spruce lean-to, to keep firewood dry at a minimum. This hail storm was just one example of the weather we faced. I used tarps to cover firewood and other items, but it wasn't enough.
Do you see that system that had spooled up off the eastern seaboard? That's some of the smeared remains of Harvey mixed in with other tropical crap. My husband actually got hit by Harvey TWICE - first in Houston and then a few days later when they both made it to Cape Breton. Water, water, everywhere, in both places. We had inches of rain in deep rural Cape Breton. That doesn't make for optimal boondocking.
9. You’ll probably only do a quarter of the things on your wish list during a trip like this.
See item #3 above, and I reiterate - this type of trip is not a vacation. I was actually naive enough to bring a few books to read - with forest management, family activities, and local social involvements, employment-related work when conditions permitted it, plus the recurrent struggle to achieve a basic bath and hair-washing, who the hell would have time for books?! I must have been daft to even think such a thing. I never cracked a single page during the entire month.
We did have several really nice camp fires, though.
And that's not all. I brought my folding bike and never got to ride it locally, in part because of all the rain. There were beaches that we never got a chance to discover and hike. Trails we never hiked. Restaurants we never got to visit. The list is endless.
I brought my hammock and got to relax in it on the lake shore for perhaps 45 minutes total across just two sessions (again, largely because of the rain). Here you see our dog sitting bolt upright in an obvious state of stress and tension. That's because my husband went out in the kayak without either one of us being with him, and she was in a major state of worry waiting for him to return.
10. No matter how challenging off-grid life gets, remember that many on-gridders have it much worse than you do.
On our long, long, long drive back to Houston, we diverted for a day into Shenandoah National Park, which is en route on IH-81 and which is rare among national parks in the extent of dog access that it allows (I'll have a separate blog post on that). Our original intention was to spend the night in the park's Loft Mountain campgrounduntil we discovered that ONE HUNDRED AND ELEVEN OF ITS CAMP SITES ALLOW THE USE OF GENERATORS!! Hereis the PDF map - count the damned things yourself if you don't believe me! Intending no disrespect, but SWEET JESUS, WHAT ARE THEY THINKING?!
They've got all this publicity surrounding air quality in the park, but what do they do? They allow extensive generator use - generators are one of the most polluting combustion / mechanical devices for their size and output. Generators may not be the cause of the large-scale air quality impacts that plague the area, but the park management sure is violating the spirit of the principle in permitting the very activities whose adverse effects they are simultaneously denouncing.
No. No matter what else I do, I am NOT living in that kind of a hot mess, not even for one night. We instead found a stealth camping opportunity and said to hell with any notion of a campground like that. To hell with it and its generator racket. What a barbaric way to live. Our stealth site was exquisite. Crickets chirping all night and zero disruptive human activity or sounds.
In sum, it was a successful trip. It was a good trip. It challenged me, it challenged us, and it exposed us to new experiences, particularly on social and technical levels, none of which I'm describing here. It was not a perfect trip. It was not an easy trip. It was not a trip I'll strive to repeat exactly the same way. But it was an indispensable learning experience on multiple levels.
Buenas noches.
Probably my favorite pic of the boondocking pad, taken before the key-hole was punched through the spruce forest for a view of the lake.


