Showing posts with label MAINTENANCE. Show all posts

Monday, June 11, 2018

REPLACING THE FRONT STRUTS ON AN AIRSTREAM INTERSTATE

Every time I fail to blog post something that we have done to our van, there's usually a reason I regret it later.  This is a short one designed to capture information pertaining to a simple replacement that has been well-covered elsewhere by others.  But here goes anyway.

This is the replacement gear - 87 2638 - Koni Shock - Heavy Track Series, is what they are called.  We had to wait several months because they were back-ordered.  The manufacturer apparently creates them on an as-needed basis when existing supply runs out.

Here's what the interior mounting points look like under the floor.
Curb side, by the right hand portion of the OEM bottle jack.

Street side.  The weight is holding back the floor covering and the rubber bushing has been moved a few inches below the location where the strut pierces the floor of the cab.
Here's an action shot showing work in progress on the street side.  The central vertical piece is the old strut.

Old strut in hand on curb side:

As for the rest of the instructions, this YouTube video below covers that fairly well.  Low video quality, but the author does present information in an organized way.  The only difference we found is that, with this newer pair of struts, Koni seems to have changed the tensioning mechanism such that it takes fewer turning motions to set it.  And my husband adds these elaborations to the videographer's instructions. 

We tested this new installation by driving to Galveston and back, given that it's too hot to go anywhere else at this time of year, and given that Galveston offers a good test drive because of the reliable onshore breeze.  The Koni struts did help to dampen certain large-scale oscillations, especially vertical bounces.  However, there's still more sway in the front end than I would like, and I'm not sure if anything can be done about that.  Maybe I'll research Sprinter Forum.

Direct link: https://www.youtube.com/watch?v=ZD0tRBrgOUQ

Embed

Thursday, August 3, 2017

REPLACING THE LP FLEX LINES IN AN AIRSTREAM INTERSTATE

This is a follow-on to this post in which I described a propane fill line failure in a friend's 2007 Airstream Interstate Class B RV.  As is often the case with RV repairs, I've gotten conflicting information from different sources, and after I publish this post, I'll go back and amend the other to reflect what I learned in the interim.

We decided to proceed with a DIY removal of those line segments of our propane distribution system that were not copper.  Our Interstate actually contains a mixture of copper (to refrigerator, hot water heater, and furnace - lines that penetrate into the interior of the living space are reportedly required to be made of copper), braided flex (fill and overfill, and to Onan generator), and solid flex (internal distribution segment) lines.  The braided flex lines were of three different diameters and were manufactured by Parker.  The solid line includes a tag indicating that it was manufactured by Marshall Gas Controls.

Note our DISCLAIMER for this kind of DIY work.  If you screw up working on your LP system, you could kill yourself.  Don't do any work if you don't have confidence in your abilities.

These were our steps.

First, I did a total burn-down of the LP tank so that it would be completely empty ahead of this job.  I ran the generator until it coughed out of operation from running out of gas.  Then after it quit, I cranked up the stove burners and watched the flames slowly shrink and sputter out.  Then I opened the residual lines to vent any remaining wisps of gas.  This step may not be strictly required on a rig such as ours, but I don't feel comfortable working with a tank full of flammable gas.

Second, I switched off the LP solenoid.

Third, I labeled the lines to be removed.

Fourth, I took a lot of photographs of the way that everything was connected (see above).  We could probably remember what went where, but why trust memory alone when the cell phone is right there in the pocket?

Fifth, it was then necessary to dismount of the lines.  My husband did this part, as brute strength helps in the process.  Plus he has far more general "working on cars" experience than I do, so he knows what things are supposed to feel like.  If anything abnormal manifested in this process, he'd be better able to detect it.

Line dismounting was not as easy as it could have been for two reasons.  Number one, there's the chronic issue of working in very tight spaces under the Interstate.
It is immensely helpful to do a four-wheel stack of the vehicle during this process, so that sufficient clearance is obtained for working. See this post for some ideas on constructing ramps, if you don't want to buy them.  
Number two, these lines were all in place for ten years and very well married to their fittings - getting a few of them free was no easy task.
It's not a simple matter of putting a wrench on it and taking it off.
This is best done as a 2-person job for this reason:
The second person can put an additional wrench on the line and prevent it from being torqued as the first person is applying major pressure to the nut in order to free the flex segment.
For some reason, the most challenging line was the one to the generator.  That took a good 20 minutes of patient work to free.

Sixth, we isolated those fresh, shiny threads from weather and road grime by cutting the fingers from nitrile gloves and using elastic bands to hold them on all exposed nipples.
At one point I bellowed from underneath the chassis (summoning my husband who was in the garage), "BUBBA, I NEED MORE CONDOMS!" when I ran out of finger segments.  Then I thought to myself, "Aw shoot, this is a family neighborhood... I shouldn't be screaming stuff like that."  :-)
Seventh, I freed the lines from their various chassis clamps.


Lines were thusly removed.
There she is... Miss America.  Sort of.  This photo looks a bit like a work of modern art. Interblog's "Ocotillo" or something. 
Eighth, I cataloged my removed lines.
I also cleaned and zip-tied them.
I was going to take them to a Parker authorized dealer to have them replicated, but I wanted to make sure I retained the essential information because I had no other go-bys.  If something happened to these lines, if they got misplaced or whatever, then I'd be S.O.L. and somehow would need to start from scratch.  My specs were as follows (outer diameters, or ODs, measured using an calipers):

  1. Fill - Parker brand, 64.75" long, 0.78" OD
  2. Overfill - Parker brand, 61.5" long, 0.53" OD
  3. Genset - Parker brand, 78.5" long, 0.65" OD
  4. Distribution - Marshall Gas Controls brand, 49" long, 0.66" OD, catalog # 42613-48 (stamped as "Flex Tech 3/8 RHA-6 Gas Hose Max WP 350 PSI)

That last one appeared to be an off-the-shelf product, but I couldn't find that exact number on the internet and I didn't know if the "close" numbers represented the same spec.  For non-consumer items, sometimes internet listings can be vague and incomplete.

Ninth, I took those neatly-bundled lines over to the hose-maker.

Tenth, a few days later, I retrieved the new lines from said hose-maker (and paid him, of course).
This shows one end of the fill line, old (left) and new (right).  The hose-maker used his discretion on which fittings were fit for re-use, and which needed to be new ones.  Some of the older fittings were actually compression fittings, not crimped, and were re-usable.  But in those cases where there was an issue, they were not.  An example is the line to the generator.  We partially rounded off the nut due to the difficulty in freeing the line from the generator.  For that reason, a new fitting was used. 
Eleventh, I re-installed and re-clamped all the hoses.

Twelfth, I had my husband check that all lines were secure.

Thirteenth, I checked the lines again, as a few weeks had passed between the re-installation and the impending propane fill.

Fourteenth, as we were en route to the propane filling station, I recited the following:
^^ The patron saint of female camper van DIYers. 
Fifteenth, we filled the tank with propane, keeping the solenoid valve closed even after the fill was completed.
For the first time ever, a female service person filled our tank, rather than a male.  I think it was Holy Mary in disguise.  
For my future reference, this is what our nominal six gallon tank takes when bone empty.  
Sixteenth, we came home, opened up the solenoid, gave her the smell test, and tried the appliances.
We were greeted with vigorous performance.  
 Seventeenth, with it having passed the smell test, I proceeded to crawl under the chassis for a more detailed leak assessment.
For that, I needed this.  Soapy water to wet all the connections and watch for bubbles. 
Crawling under the chassis in the absence of ramps was pure Suckville, especially with the exhaust train being blistering hot as we'd just driven back from the propane station.
Nnnnope.  Nada.  No bubbles anywhere. 
I stayed under there for about 10 minutes, waiting to catch of whiff of the slightest leak of propane or maybe see a bubble form, but nothing happened.

This wasn't exactly a relaxing project, and I'm tremendously relieved to see it completed.
Well, I was kind of on a meme theme, so I figured I'd stick with it.  Whew, indeed. 

Sunday, July 16, 2017

OIL CHANGE FOR AN UNDERMOUNTED, CONSTRICTED ONAN 2500 LP GENERATOR

There are plenty of short informative vids and write-ups on how to change an Onan generator's oil, but almost all of them entail side-mounted units which are easily accessed and hassle-free.  The Wendlands (Roadtreking) published this post on how to check the oil on an undermounted unit, but stopped short of showing how to change that oil, unless I missed another post.

Our particular 2007 Airstream Interstate has an unusually tight lay-out for two reasons.  Number one, it's not built on an extended ("EXT") Sprinter model, so it's shorter than many Class Bs, including most newer Interstates.  And number two, it has an under-mounted spare tire that impinges on the generator space.  For these two reasons, I thought I'd throw out some oil change tips, while not repeating the entire set of details that have been published by others.  You might want to see Tito's YouTube as a general primer for this task before continuing to read the account given below.

Note that our unit is a 10-year-old Onan 2500 propane (not gasoline) generator.  Apparently the modern-day 2500 is either gasoline or propane-powered, but ours only accepts propane.
It's also very dirty in this pic.  No sense washing it until after the oil change is done. 
First of all, let me say that this job is approximately one hundred times easier if you can ramp your vehicle.  It's extremely difficult to work under the chassis with the Interstate being so low to the ground.
These are the Interstate-specific ramps I built using wood I that picked from trash piles as our subdivision perimeter fence was being replaced by a contractor.  Blog post with instructions here
It's also kinda neat if you can have a friend keep you company as you do this work.
Just as I got very comfortable working underneath our Interstate, so too did our dog. 
Because I wanted the genset to be at the low end of the vehicle (which I thought might help with used oil drainage), I had to do what I call a "backwards foursie" - all four wheels up on ramps, mounting them in reverse (the configuration of our engine exhaust pipe does not permit rear wheel ramp drive-on).  The Sprinter does not like that maneuver because it tends to confuse the anti-lock braking system (ABS).  But it can be done if one is careful (see DISCLAIMER).

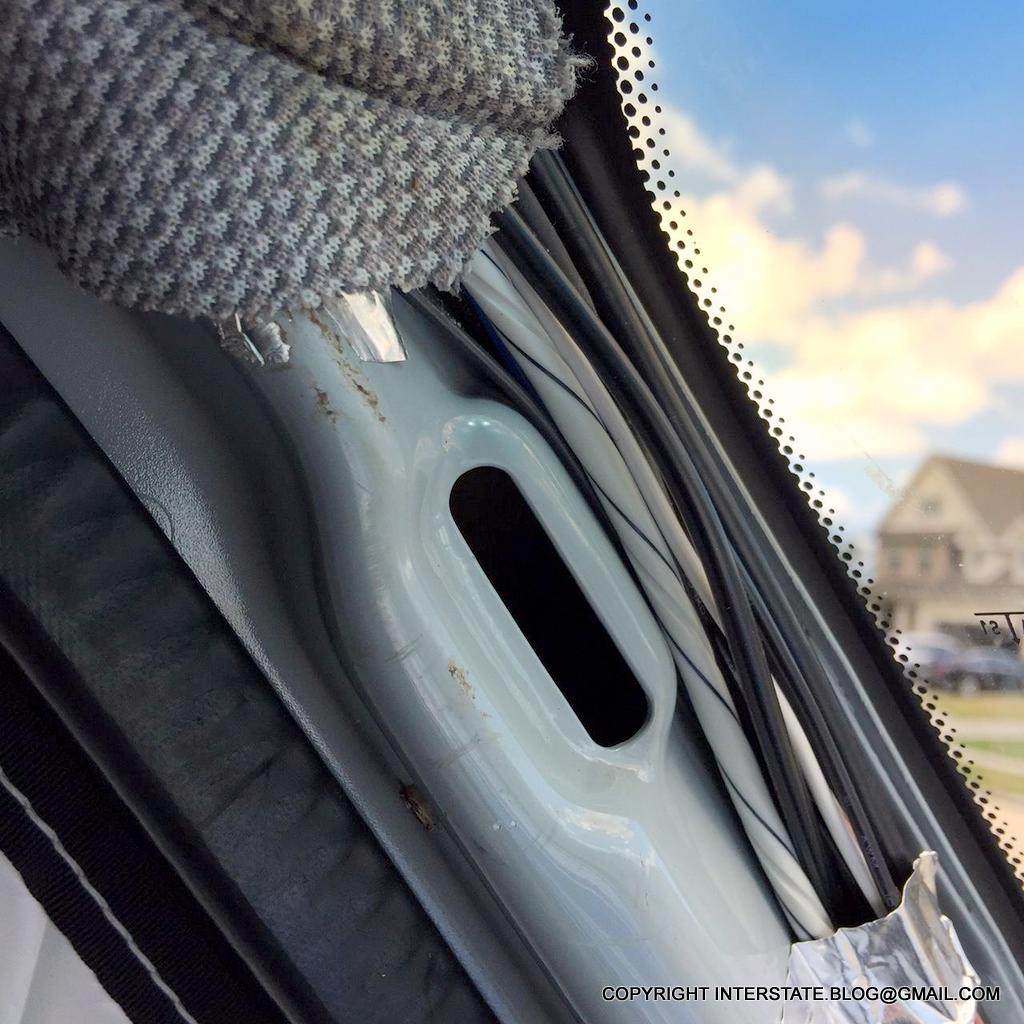
The oil drain plug is easy to locate (see Tito's video linked above).  There's no way around the need for a 9/16ths socket for this job, as Tito says.  No other tool will substitute because the plug is recessed.
I've got the socket around the plug, but here's an important point below. 
Whether you are draining the oil out of your genset or draining the oil out of your Sprinter engine, don't let 'er rip, as they say.  Use the socket to loosen the bolt, until you begin to see this.
It's now loose enough so that oil begins to leak past the threads.  
From that point, you should be able to unthread it the rest of the way using your fingers.  This prevents your socket wrench from getting drowned in oil when it starts cascading out.
Bolt removed, let drain 5 or 10 minutes into the oil pan below.  It will take a while.  
Inspect the plug for wear or damage.
Looks good to me. 
You'll notice that the oil above looks very clear, like it's brand new.  That's because we haven't used our generator in the almost 3 years we've owned our rig.  But we recently switched out our old propane refrigerator for a Vitrifrigo 2-way electric model, which means that the pressure is off our tiny propane tank.  No longer needing to conserve propane for the refrigerator while boondocking, we decided that we'd go ahead and try using the genset in certain circumstances - we might as well, because it's already there, it works, and in fact it's almost in new condition despite its age, because it was never really run.  So, if we are now planning to use it, that means that we need to do the required maintenance tasks.  Three-year-old oil should be changed regardless of how many "miles" (or hours) are on it.

Now here comes the tricky part.
This (yellow funnel) is not necessarily the best way to get new oil back into the genset.
After you've let everything drain and have replaced the drain plug, it's time to put the new oil in.  But both the spare tire and the chassis block good access to the fill port.  Even if I had dropped the spare tire, the frame for the tire mount would still have been in the way.  I had my husband hold this funnel while I tried to maneuver the quart of oil around to get a good fill, but I still managed to spill a bit of it down his arm.

They do make a small pump (something akin to a jumbo hypodermic needle with a flexible tip) that can be used for this sort of thing - I didn't know that until after we finished the job.  A simpler method might be to pour successive fractions of the quart of oil into a smaller, shorter container, say about a cup or two in size, and then lift that up to the funnel successively until the entire quart is transferred.  It's bound to be a bit messy, so make sure you have a tarp under your vehicle.

And speaking of new oil, what kind should be used?

Our Onan users manual says very little about the grade, other than it should be SAE 30.  But we decided to use this.

This formulation is de rigueur in my old near-north stomping grounds where freezing temperatures prevail for much of the year, but it's so rare where I live now that Rotella was the only brand I found that was even sold in a quart (consumer) size, given that it almost never freezes here in the Deep South. 
We now have a lithium battery system, and lithium batteries cannot be recharged in below-freezing temperatures.
From Google. 
Therefore, my husband wanted to cover a "just in case" boondocking scenario in which we couldn't charge the batteries, but still needed a source of power.  Obviously, then, the genset should contain a type of oil that is suitable for use below freezing.  Hence the 15W-40.
Image from Onan's (Cummins') generator handbook (PDF link).  
If you research this oil issue on the internet, you might find references to the use of "non-detergent" oils in generators.  My husband looked into that issue, and basically concluded that, as long as the Onan reservoir was not over-filled, foaming should not be a problem and a regular oil could be used.

Speaking of filling, I also read (as in, RTFM) that the dipstick should not be screwed in when reading the oil level.
The dipstick is also the reservoir cap.  Sorry for the blurry pic.  It's challenging to take pics one-handed under the chassis. 
In other words, for measuring purposes, you're just supposed to plunge it in, and read what's on the stick, without tightening it, which lowers the stick more deeply into the reservoir.  This Onan 2500 takes exactly one quart of oil, and after we got done re-filling, the stick read slightly higher than a quart, even given the amount that I lost by spilling it down my husband's forearm.  However, the tail of our vehicle was dipping backwards by a couple of degrees due to being "foursie ramped" in our sloping driveway, so the stick was probably reading higher than actual.  According to internet reports, as long as you don't add more than one quart to this generator model, you should be OK.  If there is too much oil, the generator will shut down and may start "foaming".

After you get the dipstick replaced, it's time to clean the outside of the generator thoroughly.  That way if oil starts coming out of any given orifice, you'll be able to see it.  Go back six or eight hours later and examine the drain plug for evidence of slow leaks.
See, now the underside is shiny because I cleaned off all the dirt.  That's the drain plug in the lower center-ish part of the photo.  No drips are visible. 
And there you have it - one more money-saving DIY task.  And not a very difficult one.
That way you can spend it on some other aspect of your Interstate, hahahah.

Sunday, March 19, 2017

FIXING A WINDSHIELD CORNER LEAK IN A T1N SPRINTER

Normally I title my maintenance- and repair-related blog posts, "BLAH BLAH BLAH IN AN AIRSTREAM INTERSTATE" but this issue is all on Mercedes Benz, with nothing to do with Airstream's Class B conversion.

The T1N Sprinter van series was designed with an unfortunate configuration along its upper windshield seam.
A picture tells a thousand words.
From a materials science perspective, those upper corners could scarcely have been fashioned into a more vulnerable configuration.  Not only are they highly stressed at the molecular level to begin with by virtue of their shape, they have to receive a deluge of drainage coming at them with a certain degree of force.  It's a one-two punch that eventually might lead to the likes of this:
The gasket begins to peel back.  
One of those corners looks worse than the other.  Let's see it in close-up.
Ewwww.  As soon as I saw this, I said to myself, "Well, my original plans for the day just went into the toilet."
It's just a tiny area on a very large van, which may make you wonder, "How did she even notice it?"

May I offer the obvious answer:  Water penetration.  Actually, only the driver's side degradation had worked its way all the way through to form a pin-hole leak.  The passenger side looked bad but was still water tight.

I always wash and wax our Sprinter and I always encourage other people to learn to do the same.  Every time someone on a forum gloats about having gotten a cheap and convenient truck wash, I wonder, "Yeah, but what incipient maintenance conditions might you have missed because you yourself were not examining your vehicle during that process?"  This case in point is a typical answer.  There is always something demanding attention with a large, complex machine.

And some of those things can get serious quickly if they aren't caught early.  In our case, we are triply motivated to not let any condition like this get out of hand.
We have a great deal of extra tech in our van, and a lot of the wiring for that tech runs down the driver's side pillar.  Water in here is a bad, bad thing. 
Fortunately, I spent much of the weekend working on some cellular improvements in the van, and so I had dismantled the Airstream trim-out and removed the headliner on the same day as I happened to hand-wash it.  For that reason, everything was exposed and I spotted the pinhole leak immediately, a condition that otherwise might have gone unnoticed for quite some time.  What did I say above?  Doing your own work is a good thing.

Do you see the white twisty wire in the foreground of the photo above?  That actually belongs to this device.
It's a long-corded water leak detector.  I had been using it around my fresh water tank, but I pulled it up and repurposed it for the driver's side pillar (I'll put another detector at the water tank).  I ran the detection wire the entire length of the pillar...
...even shoving it up above the headliner...
...and then I mounted the noise-making end of the device under the dash next to the bluetooth on-board diagnostics (OBD) scanner.  In case you're wondering why it's upside down, that's because the 9-volt battery is replaced via the "top" end which would be too difficult to access in this location if I put it rightside-up.  This way I pop off the little flap and the battery falls out the bottom instead. 
So, OK, that's my future leak alarm system for this vulnerable location, but what about fixing the leak itself?  That process went like this.
Being a POR-15 junkie, I first used a toothpick to coat the exposed areas, where the gasket had pulled away.  I let that dry for about 4 hours.  We had a beautiful 80 degree sunny day here, so 4 hours was more than enough time. 
Then I applied an RTV sealant over the top of the degraded areas.  You'll notice that I did not attempt to bend back or push flat the portions of the rubber gasket that were lifting away from the body of the van.  That material is a decade old and stiff and I was afraid that if I tried to lay it back down, it would just pop off again, tearing away any new sealant with it.  Rather, I mounded up the RTV compound to encapsulate the corners that were poking up.  These are very small areas and this patchwork is not noticeable from the ground, so I'm OK with the somewhat amateurish-looking application.  The main thing is that it Must Not Leak
This is the product I used, which might not be ideal.

This Sprinter Forum thread is not necessarily fond of using any silicone-like product around the windshield perimeter, but (a) I wasn't sure what else to use that I could obtain in sufficiently small quantities on short notice, and (b) I was only doing a couple of linear inches, so we'll just pay extra attention to prepping those corners in the future if we ever have to do a wholesale windshield replacement (there's some suggestion that a silicone product might interfere with a future sealant application during windshield replacement).

So there you have it, another chunk of a Sunday afternoon devoted to rig maintenance.

EDIT 20170321:  See also this Sprinter Forum thread on this issue for further discussion.
Actually, it never stops.  

Saturday, February 11, 2017

REHABBING THE GROUND EFFECTS SUPPORTS ON AN AIRSTREAM INTERSTATE

This is what I mean by "ground effects" on our 2007 Airstream Interstate.
It's really a running board and fender package, rather than the skirt style ground effects that newer models have.  I *love* the running boards - they furnish instant outdoor seating wherever I am.  Very convenient and we don't need one of those pesky electric steps that seem to break routinely.

The construction of the wooden ramp you see in the photo is described here.  I painted them after construction because I didn't want the raw wood to soak up rain water.  The upper surfaces are red so that they catch the eye of the driver as if to say, "Hey, don't forget to dismount the vehicle from the ramps before you try to drive away." (We also use a flight tag as an internal reminder).  But the front and sides are slate gray, so that they won't be screamin' obvious when viewed by passers-by from the street ("Hey look, our neighbor has their truck up on ramps again... isn't that cute.")
Airstream did a beautiful job cosmetically of these add-ons, but unfortunately, the supports are made of ordinary square tube steel and steel plate.
I call them the "outriggers".  They descend from the chassis and make a right angle before proceeding over to the running boards to form the primary supports.

As you can see, the original coating had failed and rust was beginning to take hold.  Yet another maintenance task for me, whoopee. 
I had spent boocoo (from the French "beaucoup", in case you ever wondered)... boocoo bucks on the POR-15 products that I had needed to repair the roof seam rust (description here).  I had plenty of those materials left over and they are expensive (about $30 for the pint of POR-15 rust paint) so I wanted to keep going with my rust work before they spoiled on me (the paint has a sky-high VOC content and would not last in a can that already had a cracked seal).  
Another view of the coating failure on one of the "platforms" that secures the running boards to the right-angled outriggers.  
 I followed my usual practice of removing caulk applications where the seal had obviously failed. 
You can't see it very well by looking at it, but the rust had worked its way under all six of those big dabs of caulk sealant on this platform.  
 But if I saw a location where the original caulk appeared to be holding tight, I left it alone for now.  I can always go back and touch up later if it degrades.
Photo is out of focus obviously, but I had to rip all the caulk off the bolts that secure the "platforms" to the underside of the running boards.  The seals had all failed, and you can see that the surficial rust extends all the way to the bolts.  
So basically this is a three-step process.  First, I used the wire brush as shown in the second photo in this blog post.  
Aaaand I killed it.  It doesn't seem to matter what form of metal abrasive tool I use - it gets destroyed.  Same thing happened to me when I was using an angle grinder on the roof a few weeks ago. 
I followed up with steel wool to smooth the surfaces.
A surprising amount of crap was thusly liberated.  This is all from just the first little outrigger and its platform.  A tarp on the ground under the rig is a good idea, especially for this next part. 
Then I applied the POR-15 prep spray, which is a phosphoric acid compound.  It reacted strongly with the rusty surface, so I wiped it off, applied a second dose, and let it set for about 15 minutes.
After the excess gets wiped and the surface dries, it resembles this blackened shellac type of surface.  It looks wet even though it is not.  
That was then followed up with a coat of POR-15 paint, the first of several more to come.  As with the roof seams, I used a foam brush to apply it. 
That in itself has a kind of otherworldly sheen to it.  Once I get done with all coats, I'll re-caulk all those bolt heads.  In the background, you can see a couple of the original outriggers, as yet un-done, with my under-chassis stacker rack on them (construction description here).   
Obviously this job is not the most fun thing that a person could do with their camper van, so I think the trick is to take it slow.  You can see from the photo above that my rear wheels are not also on ramps - that's because my husband was working on the lithium battery system at the same time I was doing this, so I couldn't efficiently flip and re-stack the van.  The only way to get all 4 wheels on ramps is to do a back-on, because our exhaust pipe was installed too low to clear the ramps for a drive-on.  And I really can't do this work efficiently until all 4 ramps are in place.  But now that I know how much time and energy will go into each outrigger, I can plan accordingly and do a few per session until they are all complete, thus stopping short of driving myself crazy at any given point in the process (hopefully).  

And in closing, a reminder...
Not on a job like this, not with debris raining down into your face and the metal prep consisting of a phosphoric acid compound.