I don't think I mentioned this in
Part 1, but when I ordered that Lagun table from Merry Ol' England, I bought an extra receiver. Today with some help from DH, the second mount got installed in the rear of our
Airstream Interstate. I've covered some of these installation ideas in Part 1, so this post is mainly a photo tour.
There is one place in the rear of our van, a cabinetry bulkhead, that was fit to receive this second mount. It looked like this:
 |
| It's mostly a void space the frame of which doubles as a jack-knife couch support. |
As with the front mount, the under-blocking had to be as non-hooking as possible (no busted shins on sharp corners), and it had to conform to the available space, which in this case was narrower than what had been available at the front. Therefore, rather than cutting a standard 45 degree angle on the block, I had to compute the angle instead.
 |
| Trig! I got to do trig! I haven't been this excited since I had to solve two equations with two unknowns on one of my client's waste disposal cost matrices. |
 |
| Here's the view from above down into that space. My bad for not vacuuming out the dog hair prior to taking the pic. |
You can see that there's a structural cross-member spanning the space (the little shelf with the most dog hair on it). That means that my rear blocking plate had to be cut in half for this one, vs. a solid plate in the front of the van. Plus we decided to install a sheet metal top plate to strengthen the area further. As usual, all my prototypes were first cut out of cardboard.
 |
| Like this. |
 |
| And this. It's a tight space behind there, so I fit the cardboard first, then chopped up the plywood backing plate that came with the extra receiver. |
 |
| Action shot - screw holes being drilled in the upper metal plate. |
 |
| Post cutting and drilling, pre-painting. |
 |
| The three pieces coated and drying in the subtropical sun. |
I didn't take pics of how I fashioned the block, because that process was much the same as in Part 1. Attaching the block was simple - we clamped it on, and drilled holes all the way through.
 |
| Like this. |
Getting those plates on the rear side of the bulkhead was not as tough as you might think.
 |
| View from above. We used L-brackets for redundant strengthening. |
 |
| There's the top plate. It's black like the frame of the Atwood jack-knife couch. We did have to remove the bottom half of the couch to make installation of this plate easier, but that's pretty easy - just four bolts. |
 |
| View from above with the couch down. There's little risk of hitting the block because it does not protrude beyond the couch edge. It sticks out just enough for the vertical support to clear the edge of the couch. |
 |
| There's the vertical member, sans table top. |
Guess what this means?? I get to delete both the receiving cups and the old table legs from the van inventory. Removing the receiving cups from the underside of the table made it considerably lighter, which is very helpful given that we are hanging it for storage on the outside of the wet bath door. It also gives it a cleaner look.
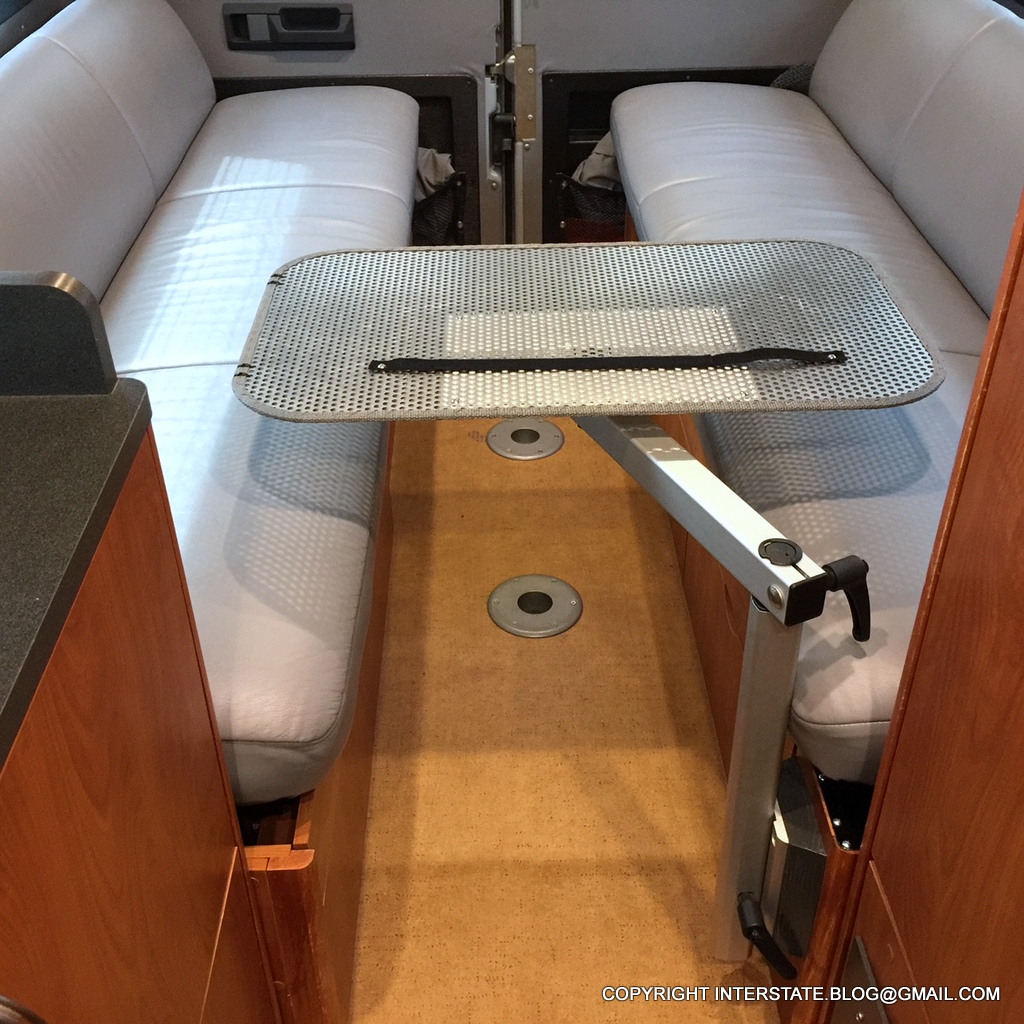
Now you have to endure a bunch of money shots showing the range of motion with the table in this location.
It's really convenient to have a one-piece table that swivels completely out of the aisle when needed. Initially I wasn't sure if I was going to use that second receiver, but I'm glad I ordered it.
 |
| Footloose and cup-free. Fancy, too. |
20180926 EDIT: Pic of the new rear mount in action. I enjoyed it immensely during my recent 5-week trip through the United States and Canada. I got a lot of important work done on it.