Now, you may ask, why did I settle on that design instead of some other?
Well, first and foremost, it became apparent to me that I would never be able to physically manage this screen (put it up, take it down) unless it were divided into sections. I couldn't sew a single surround where, for instance, maybe you could squeeze into it through the side, where the screen meets the van body. It would simply be too large.
Logically, then, if it had to be two pieces, the simplifying assumption was to make it into two identical pieces. Less head work that way, and it would also produce visual symmetry.
So, if I were going to make two identical panels that would meet in the middle, I thought I needed something to signify that entry would be through the middle where I was adding a magnetic closure. For that reason, and also to increase lateral strength, I added a seam near the bottom of the two side panels, but kept the center panels full-length and less visually obstructed. It's sort of analogous to what is often done with lobby windows in skyscrapers. There's usually a visual design feature that orients you toward where the actual door is situated in all that glass.
My construction sequence was as follows, generally speaking for each of the identical panels:
(1) I cut two 70" side panels of noseeum fabric and stitched them together down the side (see second pic down for instruction on the flat seam).
 |
| It would be best to have a room-sized table for this work, as they have in industrial businesses that manufacture boat sails and other large fabric items. But most of us don't have access to that kind of thing, so I used my kitchen floor. At times I also used painter's tape to hold the fabric in place, as much of my measuring was done off the ceramic tile seams rather than with a tape measure, because the thing was so large. |
(2) I trimmed the tops with the rip stop nylon. On the panel that must eventually attach to the center full-height panel, I left a "tail" of rip stop to be spliced into the top portion of that center panel.
 |
| I cut 4" strips such that, when they were seam-folded on both sides, the resulting top border was about 1.25" wide. |
 |
| Six of these strips have to be cut for the top portion on each of the two screen halves, and then more for the central magnetic closure. I used a 4" template to cut several, and then had to re-square my rip stop before proceeding with more. With large projects, inaccuracies tend to snowball unless they are corrected. |
 |
(One day I will get around to replacing this disgusting ironing board cover.) This photo shows that the nominal widths of the two fabrics are different, but that doesn't matter. In fact it's helpful in splicing the various panels together. You wouldn't want selvage seam to fall on selvage seam.
This photo also shows the side seaming method. Place two panels together, fold over jointly, sew near the raw edges, open it out, fold it flat over the raw edges, and stitch the seam open. |
(3) I stitched the bottom pieces of noseeum onto the side panels using the same approach.
 |
| In yoga terms, there was a lot of wide-legged folding associated with this work - without an industrial-sized work table, this becomes a surprisingly strenuous project. Here's one of the bottom strips getting positioned and readied for cutting. |
(4) I cut the longer center panels (both of them) and stitched one side seam on each. This was where the magnetic closure would go, as it is to be encased in yet another strip of rip stop on each one.
(5) I cut and spliced the center strips of rip stop, ironed them (your iron will be your best friend in a project like this), pinned them to the fabric, and inserted the first row of neodymium magnets into that strip to be sewn shut.
Here's my method of working with neodymium magnets in a sewing context. I hold the magnets to be included
inside the workpiece using magnets temporarily situated on the
outside of the workpiece. Neodymiums are so difficult to work with that I haven't found a better method.
 |
| So here, for instance, is a close-up of the two center panels. The neodymium magnets that you see are not the ones that will be permanently affixed to the workpiece - they are holding other magnets in place, that are inside these seams, until I can get them hand-basted into position opposite each other. |
 |
| The stitching process will scoot the internal magnets around because the magnets will want to stick to the sewing machine, but if there are "keeper" magnets placed on the outside to control them, they won't get lost in the seam pocket and the outer magnets can be used to re-position them to where they ultimately need to go. Then, after the internal magnets are hand-basted into place, the outer magnets can be removed. |
It's important to do this magnet positioning thing accurately because otherwise the center strip will have gaps. And gaps will let in mosquitoes. Let me explain further.
 |
Here are the two center panels with all of the keeper magnets in place down the center of each converging side. You can see that they are directly opposite each other - to within a couple of millimeters. Tap the photo to expand for greater clarity.
Obviously I'm controlling an avalanche of noseeum fabric using clothespins here. Otherwise, it would be impossible to work with. |
 |
| And here's what it looks like once the internal magnets are all stitched into place and attracted to each other, one side panel to the other, and the outer keeper magnets removed. The resulting magnetic joinery lies flat. Very important. |
 |
| Here's an interim stage of stitching, where both center panels are finished where they meet, and the double side panel is situated beside it. In this pic, I've yet to add the extra foot or so of noseeum fabric at the bottom of the side panel. |
(6) Once the center and side panels were completed respectively, I stitched them together down their common side. At that point, I was manipulating a workpiece that was about 82" long and 165" wide, so I needed to employ a lot of clothespins and patience to get it done in a controlled manner.
(7) I repeated the general sequence above for the other half of the project - the other compound panel that consists of three widths of noseeum fabric, rip stop borders, etc.
(8) You must periodically stop and reality-check your half-finished workpieces against your vehicle.
 |
| Here I've got two side panels attached to their center panel and held in place using office binder clips and a few magnets, just for measuring purposes. Obviously a bottom trim piece will need to be added and I will describe that further down. |
In that photo above, you can also see a hint of another reason why I chose to DIY this job instead of trying to buy a product off the shelf. Notice that the noseeum fabric is bunched up next to the body of the van. That's because the awning is not fully extended. And why isn't it? Look at the bottom of the noseeum fabric. It's blowing in the wind (in fact, I tried to temporarily weigh it down for this fitting by clamping adjustable wrenches on its bottom edge). We have noticed that the awning becomes unstable even in light winds, if it is fully extended. But we can achieve a much more secure configuration by electing to keep it only partially extended. Therefore, I needed a screen that would fit both scenarios - no winds at all, and light winds - and there's no commercial product on the market that would do that.
 |
| Here's a visual way of saying the same thing. |
In other words, I had to customize this screen for a
range of awning extension configurations, not just a single configuration. You'll see how I did that below, and it invokes a very important tailoring principle. If you look at old pictures of tailors servicing their clients, you never see them sewing a workpiece in a vacuum. You always see them fitting the clothing directly onto their customers.
 |
| Like this. Random pic from the internet. |
The same is true of camper vans. You can make all the measurements in the world that you want, but this process works best if the customer (the van) is fit in real time, step by step. So what I ended up doing over and over again was putting the partially-finished screen on the awning, so that I could complete it iteratively.
 |
| Of course, this piece of tailoring did not simply hang passively and stay still the way a pair of pants might do on a gentleman. There's always at least a breath of wind outside, if not an outright breeze, and I had to weigh down the unfinished bottom edge using a variety of available garage tools, including C-clamps, welding magnets, and this adjustable wrench. |
 |
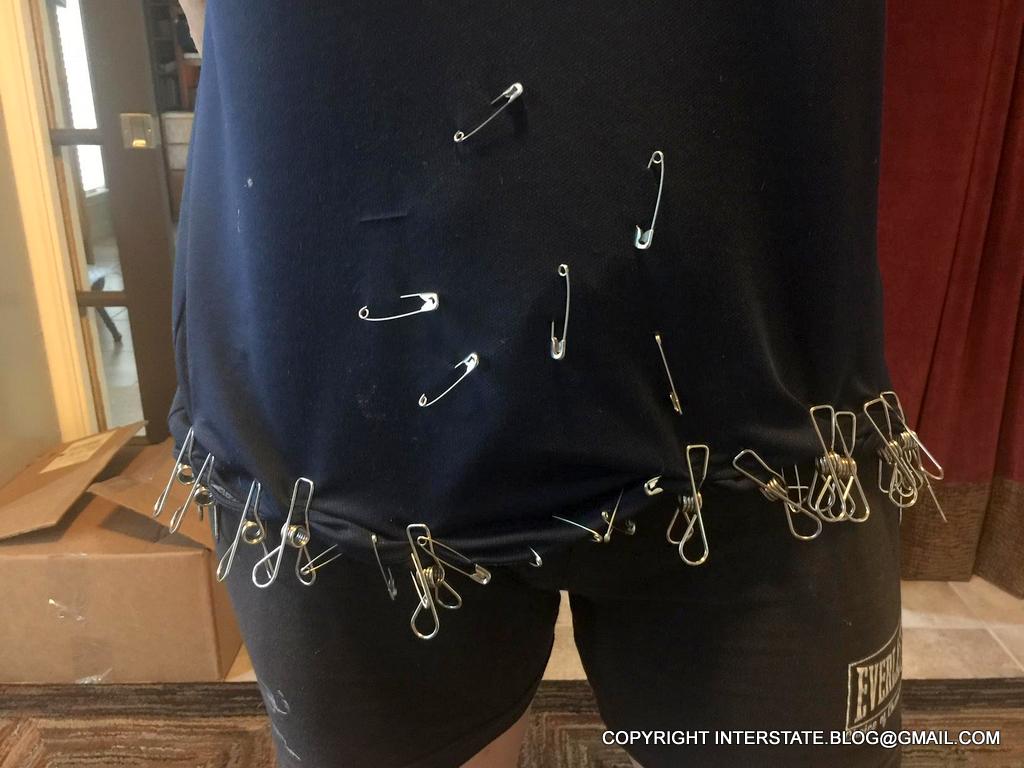
| Every time I located a spot where a tie had to be placed, I added a safety pin as a temporary marker. On a large item such as this screen, a safety pin is more effective than a straight pin. |
 |
| This is what I looked like during this stage of the project - wearing one of my husband's crappy old baggy T-shirts because our heat index was near 100 degrees F, with all these pins and stainless steel clothespins stuck to me. Those stainless steel clothespins will be used to augment the paracord ties, and on the internet they are called, "30 Pack Wire Clip, Durable Stainless Steel Clothesline Clothes Pins". I'll talk more about them in an addendum to this post. |
 |
| Once I got everything pinned, I would stitch pieces of paracord in the locations they were meant to be. I burned the ends with a Bic lighter, but if you do this, be mindful that sharp pieces can remain on the burned ends. These could snag the no-see-um fabric if not smoothed off. |
In that photo above, you'll notice two ties added to the seam, one above the other. That's because the upper tie is the one that would be used if the awning were extended to full length. That tie would then fall at the intersection of this cross-bar. In that photo, the awning is in its somewhat-retracted position.
Now, a word on that orange paracord I'm using for the ties.
 |
There's no law that says that the ties have to be made of orange paracord - some people would prefer a more subtle approach. But number one, I have vision limitations that make it difficult for me to see black on black, so using a dark color would hinder my ability to quickly locate and tie off the screen in every place where that were needed. And number two, using the orange made the screen look very automotive (channeling the phrase "looking very Presidential") - it causes the T1N Sprinter reflectors and turn signal light covers to visually pop. Personally I like it, but it's a matter of taste. Plus, orange at the lower level of the tent stakes says, "Don't kick me."
I laughed when I saw that picture above because the reflection of my bare feet is visible in the paint next to the rear turn signal. God bless Houston - it's almost always hotter than hell. We rarely do any project with shoes on. I even cut and de-burr metal while barefoot. |
"Fitting to the customer" allowed me to verify that the center strip of neodymium magnets did, in fact, function as I designed.
 |
| I think this is more convenient than a zipper. Don't worry - those neodymiums will "find" each other if the two halves of the screen are brought in proximity to one another. That is exactly what neodymiums do best - they "find" what they want to stick to. |
This next part is difficult for me to put into words because it's a non-verbal brain thing. Because I was fitting this for multiple awning extension lengths, there is excess fabric adjacent to the body of the van. That has to be managed somehow. I did that by setting it up so that the excess could be folded back over and would meet the first vertical seam in the no-see-um fabric, such that I could tie it off neatly there.
 |
| And the next obvious question is, "Well, how did you arrive at that measurement?" I don't have an answer. It's a nonverbal spatial thing and I "just did it" without consciously thinking about it. It's was just a natural derivative of this whole iterative process. |
By the way, here is now I anchored this pair of screens to the body of the van.
 |
| LOVE these "Master Magnetics 07580 Magnetic Hook with Rotating and Swing Hook, 1.47" Diameter, 0.54" Thick, 65 Pounds, Black" They have a rubberized back side so they won't scratch the body metal. And they are extremely strong. |
 |
| Other side of the awning, tied off to the magnet. |
(9) Moving on, once I began to refine the fitting in the near-to-end phases of this project, it became possible to verify the bottom trim configuration. Here you can see one of the two mostly-completed workpieces with the deeper (next to the van body - remember, the awning is sloped) section of bottom trim placed for measuring purposes. Remember too that, because the awning will be extended variably, this is not an exact science. There is not one single slope configuration to be fit, in other words.
 |
| You can see my increasing problem. Even folded over, the panel has now outgrown my kitchen. At this stage, it's about 13 feet long and is about to become around 7 feet deep with the addition of the bottom trim. |
Don't be surprised if errors get introduced during this massive process. Such was the case with my effort, where the two panels ended up not being exactly the same lengths, which was important because of the magnetic center closure. They had to be consistent. So this predicament caused me to empty half my great room of furniture so that I could lay them out together, one on top of the other for comparison purposes, and make final adjustments to the bottom edge.
And finally, the long-awaited money shot:
 |
| There she is - Miss America. With two REI camp chairs for scale. |
Just as importantly, here's what that money shot packs down into:
 |
| Hard to believe that's right around 175 square feet of fabric stuffed into that laundry zipper bag. It's the size of a small pillow and weighs 2.0 pounds (I'll discuss the stakes and clips in more detail in a subsequent post). A similarly-sized device crafted out of conventional mosquito screening would be many, many times this size. |
A few words of wisdom for anyone who might be dumb enough, er, ambitious enough, to take on this type of massive project.
- Take your time. It's more work than it looks. I did mine in stages, across blocks of time in three or four weekends.
- Have patience. Each individual seam is up to 13 feet long, and these are tent seams, so they're really twice as long as that - 26 feet each. Take a break and watch TV if you get burned out.
- Be methodical. Inch by inch, life's a cinch. Use clothespins to control the workpieces, or some other method, so your efforts won't start spiraling out of control.
- Don't sweat the small stuff, and on a project this large, it's all small stuff. Nobody is ever going to notice an inch thrown here or there on a workpiece that consists of two pieces each thirteen feet wide! Forget about imperfections and just sew as you go. The one exception obviously is the neodymium frontal closure. Those magnets have to line up fairly well, as I described above.
In my next post, I'll talk about making a couple of accessories for this screen, including a "skirt" to go around the van's ground effects to stop mosquitoes from entering the enclosure by that route - from underneath the van. In the mean time, happy
#vansizedsewing!!


No comments:
Post a Comment