I decided to rectify some of the excess dead space in our
Airstream Interstate's galley cabinetry, and solve the annoying problem of where to put my full-sized frying pan and a few other items that were simply getting piled on top of my existing under-counter storage baskets. I don't like stuff piled on top of other stuff. To get at the other stuff, you have to excavate the cabinet and of course in the small space of an Interstate, where do you pile the stuff that you have just excavated?
I decided to adapt an under-counter storage basket to reclaim some of that unused space resource. These are sold in a number of different sizes and styles.
 |
| Many of them are intended to take advantage of dead space in dish cabinetry, such as this example from The Container Store. |
I settled on a product called the "
Design Ideas Under Shelf Mesh Basket, Large" because it had dimensions that were nearly optimal for the T1N Interstate; specifically, it was almost exactly as wide as the available under-counter space between the Dometic sink and the gas stove. Plus, it is constructed of the same finely-spaced metal mesh as the
silver magnetic mesh bins that I had gotten from The Container Store to place on our
twin wall pocket strips.
 |
| A little stylistic consistency never hurt anyone. I didn't get this from The Container Store, however. As of this writing, I got the last two that were available via Amazon Prime, although they are still available from other vendors. |
Let me run through the installation sequence for ya.
 |
| We used bolt cutters to snip off the "arms" such that we were left with a three-sided basket. |
 |
| We snipped small screw holes in the mesh. We installed the back side of this device up against a wooden support member for the counter itself, the right side flush with a protective wood strip adjacent to the stove. The remaining left corner we carefully screwed into the underside of the countertop itself. Thus, two of the three sides were simply screwed into existing wooden support strips, and the last point was secured via one of those zip ties that has the screw hole end. I'll explain with a few more pics. |
 |
| This is the kind of cable tie to which I refer. |
 |
| Zip it around the upper support bar of the basket and cut it flush. |
 |
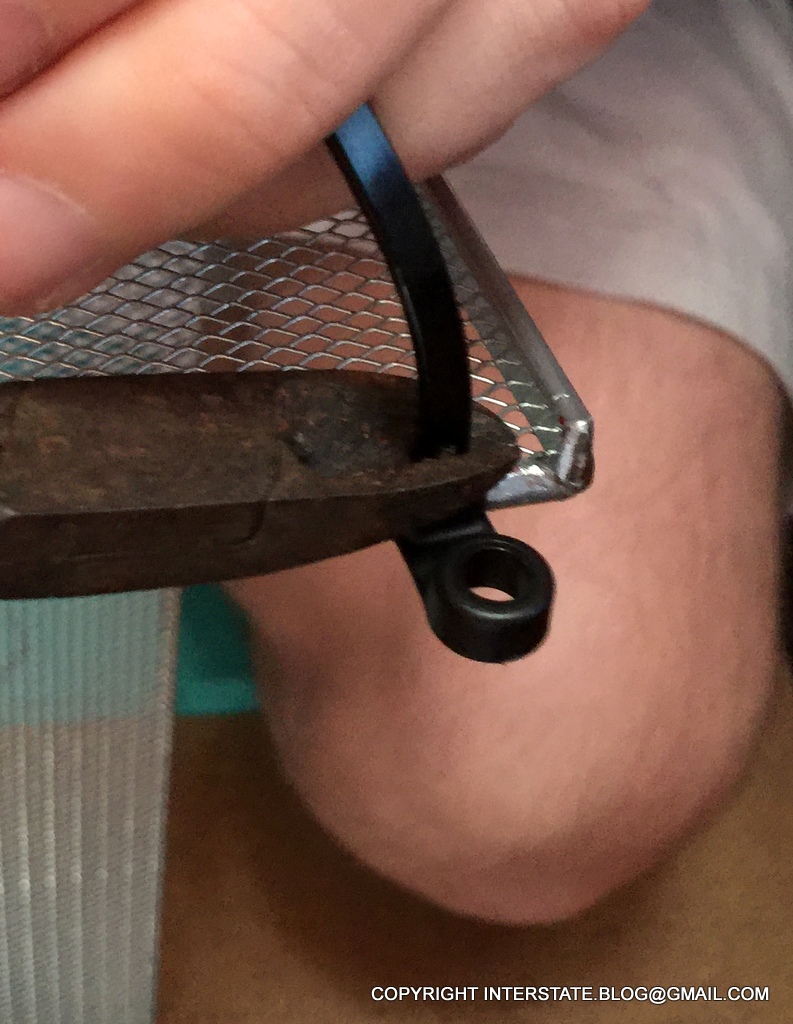
| Then you are left with this little tab through which you can run a screw. |
 |
| Like this. We also used washers for added support, but I think this piece would do nicely without them. |
And the money shot:
 |
As I said above, it's a good size for the T1N Interstate cabinetry. The gray blob at left is the underside of the Dometic sink. The white strip at right is the spacer that protects and anchors the stove. The basket is a near-optimal width and depth to provide an additional storage shelf without obstructing movement of the items stored below.
You can see how the basket is anchored by five screws with washers. There is room to store additional items in there with the frying pan (and I probably will). BTW, the lower dish and utensil storage basket is described in this previous post; the cutlery is inserted individually into the basket weave so that it won't rattle up against itself while the vehicle is in motion. |
You'll also notice a mini-bungee cord extending across the front of the 3-sided wire basket as a keeper. Some of these under-shelf baskets have a lip on the front edge to prevent items from accidentally sliding out. This one does not, but the cord serves the purpose. I bought a plastic sack full of mini-bungee cords for five bucks at Walmart shortly after we first bought our Interstate. They have a hundred and one uses.


No comments:
Post a Comment