This photograph reflects my boundless despair and says everything that needs to be said about this common van-related predicament:
 |
| That's an infrared thermometer pointed at our Airstream Interstate's roof and reading 146 degrees. Conditions when the photo was taken on March 27, 2017 1:40 PM in greater Houston Texas were as follows: 85 F ambient air temp, sustained 3 mph west wind (I was facing west) with gusts to 10 mph, partly cloudy. I took the photo at a point where there was more than a momentary break in the clouds. I wanted to see what full-on sun would produce in the way of temperature. |
The interior ceiling below this point read 110 F at the same time. This is an obscenity. I knew it was hot, but until I bought that thermometer, I had no idea it was
that hot. Many Interstate owners complain that their vehicle air conditioners can't keep up with cooling demands in the summer months. This is a big part of the reason why.
Obviously something had to be done to improve the situation, or at least try. After a lot of research that produced no clear answers, I settled upon a product offered by
Hy-Tech Thermal Solutions of Melbourne, Florida. Why did I choose them? First, I was guardedly encouraged by what one James Wong, aka Instagram user Eagle2232,
had published, and I'm adding a screengrab of it here because content does tend to disappear from the internet over time:
 |
| Tap to expand for read-ability. But then don't take this Instagrammer's instructions as gospel - also see what I have to say in the sections below about application strategy. |
James's vehicle is almost identical to ours, and that's important - a product that might work well on a Class A with a different roof material construction (rubber, fiberglass, or whatever) is of little use to me as a comparator, because I have a standard metal automotive roof. Unfortunately there's a limitation associated with user forums and other social media outlets - little to no retrospective reporting and follow-up by most users. At the point where I screengrabbed that image above, it had been posted for 40 weeks. Well, we don't know what James's roof treatment looked like after 40 weeks (he contacted me on Instagram and I asked him, but I'm still waiting for a reply). We won't know what it will look like after 150 weeks, or 250 weeks (Hy-Tech's main product
Bus Kote is supposed to last 5 years before re-application becomes necessary). But again, at least this was an example of an application
on the same vehicle. It was the best I could do, research-wise and evidence-wise, at this point in time.
And as an aside, may I observe generally that we Class B DIY owners never, ever pass up any opportunity to increase effective vehicle insulation. Every small opportunity for gains is seized. Proceeding from one James to another James, this was demonstrated nicely about a week ago when James of
The Fit RV published
this post describing how he fabricated a new interior cabinet. I was only minimally interested in his new cabinet. I mostly wanted to see the insulation that he added in the process.
 |
Before and after. It seems that every Class B out there has crappy OEM insulation - why is this? I don't know - it makes no sense because it's SO IMPORTANT!!
Screengrabbed image pair courtesy of The Fit RV. |
The other reason why I chose
Hy-Tech Thermal Solutions is that I phoned them and the person who answered the phone (Trish) took the time to walk me through the products plus the application strategy that she felt would be most appropriate for my particular climate of residence (i.e., near the Gulf Coast, as this company itself is). So this phone experience further increased my confidence (or perhaps I should say that it increased my hopefulness) that maybe this would prove to be a good-performing set of products for our Sprinter-based Class B.
 |
| And by that I mean, this set of products. I actually needed somewhat less than one gallon of Bus Kote but Hy-Tech had recommended I get two. |
Trish recommended that, following initial surface prep, I use
Aqua-Prime #15 as the primer. Something different is currently stated on their website. Furthermore, instead of recommending the type of clear coat that James Wong had used on his Sprinter, she recommended that I simply do one coat of primer followed by at least two coats of Bus Kote, and no clear coat, because they (Hy-Tech) aren't entirely satisfied with the way that the clear coat is aging in subtropical environments (honesty in a vendor = points scored). Then, when the Bus Kote starts to show visible signs of aging, clean the roof really well and add
one more layer of Bus Kote on top of it to refresh it, which is an approach that cannot be used if a clear coat is in place.
I will state categorically that I typically will not attempt any project using water-based products, especially on metal. I'm not a professional, but I've done a lot of painting in my time, and I've just had too many bad experiences with those types of resins. They often weren't developed because they offered superior performance - they were largely developed in response to environmental initiatives - vendors were forced into creating them by environmental regulations that restricted volatile organic compound (VOC) emissions from coating products. And then, not wanting to lose money, many of those same vendors tap-danced frantically trying to convince their customers that the performance of the resulting products is still acceptable despite the forced reformulations.
One of my clients whose entire job for the past 40 years has been to track the real-world performance of industrial paints has told me that I'm misguided, and that some water-alcohol +/- synthetic amine type products have actually advanced to the point where they are performing on par with their petroleum-solvent-based analogs, even in the case of metal applications. To which I replied,
"That may be true - but the problem is that we as consumers have no practical way to tell an effective product from a bucket of crap, and therefore I'm sticking with solvent-based compositions."
However I was unable to identify a solvent-based alternative to Bus Kote. If you think there is one out there, you would receive my heart-felt gratitude by emailing me to tell me about it (interstate.blog at gmail).
In the meantime, I felt that I had to move forward with some kind of thermal application, experimental or otherwise, and so I chose to go forward with this. Should a worst-case scenario subsequently develop, I'll spend a lot of future time stripping it back off again and hopefully will find a better alternative. Sometimes, ya just gotta iterate, as time consuming as it is.
As a final note on my digression, I will also say that I don't necessarily take the performance claims of products like this at face value. Bus Kote contains a ceramic compound that is claimed to increase its insulation potential (tech data sheet
here). There are specific quantifiable reasons why I question those claims but I won't get into them right now because this post is already lengthy. I suspect that this product realizes the vast majority of its efficacy by simple virtue of its sky-high
reflectance. But with or without any "high tech" ceramic actually performing a function in the product, I still needed an
elastomeric that was designed for an automotive application, so I chose this one irrespective of larger claims.
Now, back to my procedure. Here's what our roof looked like in its original state.
 |
| Sheet metal with several layers of a primer-like paint applied. To the best of our ability to tell, this is the original Sprinter cargo van roof. Airstream added the automotive paint everywhere on the vehicle except this central roof patch. |
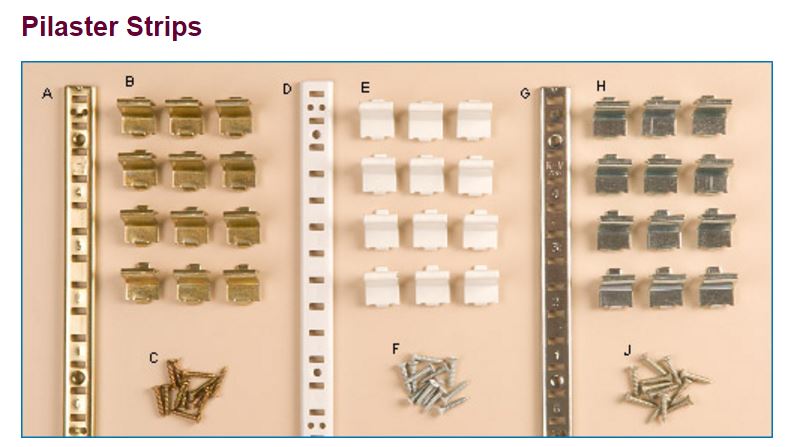
Of the products you see in the product line-up photo several paragraphs above, I only used the coatings (Bus Kote and primer), the gray roll of 180 grit sandpaper, and the tape. I deleted the other sandpaper and tack cloth.
I got the tape from our local
Tasco Auto Color store. I walked into the store and asked the proprietor,
"Which of these tapes should I use?" and he replied,
"Well the blue tape is complete crap, and the yellow tape works very well but will deposit a residue if you leave it on your vehicle for more than 2 or 3 hours." I had to do three to four coats, so green tape was the best choice for my application, given that it had to remain in place for more than 24 hours. It's called
Scotch 233+.
I strongly recommend that you
wash and hand wax your rig before attempting this project, perhaps the day before you are scheduled to begin. The polymer coating (wax) that Airstream recommends for our vehicle is called
Rejex, and I've been pleased with its performance. Note that the Rejex motto is,
Nothing sticks but the shine. That's very
a propos in this context because
you will drip something down the side of your rig as you do this project. Gravity is gravity, and no matter how careful you are, working on the roof of a van conversion is so difficult and so physically exhausting that some little accident is almost guaranteed to occur. In which case you want fresh wax on your vehicle (everywhere but the roof, obviously) so that you can remove little roof coating drips and smears and splatters cleanly and easily.
This first phase of work takes a strong, able-bodied person about 4 hours. I started at 3 PM on a partly cloudy day but later regretted that strategy for reasons I'll reveal below. I recommend that you begin in the early morning instead.
First step in the process is sanding. I used a 180 grit automotive paper we had left over from another vehicle-related project years ago, so I cannot give you its brand.
 |
| Our roof finish looks shiny in the background of the photo above, but it's really kind of satiny. Notice the amount of paint dust in the foreground - it is necessary to remove that shine before applying any new coating, because I know of no coating that will adhere properly to a mirror-finished surface, be it latex or an oil-based enamel. I used a sanding block for the flat areas but manually did all the areas around the roof ribs and penetrations. By "manually" I mean, I took the sandpaper in my hand and sanded the old-fashioned way. There really isn't a tool for that kind of work. |
 |
| Another view of the sanded roof, near the completion of the process, without all the sanding fines (dust) removed yet, hence it appears chalky. |
There was too much paint dust remaining after this process for it to simply be wiped off, so I did a very thorough rinsing with the garden hose. Then I gave it a good detergent scrub. I use
Dawn dish soap, original formulation with minimal additives, as a general surfactant in many applications (I even wash our dog with it).
 |
| Don't just wash it passively but scrub it by hand, to remove anything that might be loose or still waxy after sanding. |
Then I towel-dried it by hand and gave it about 30 more minutes to thoroughly air dry. Remember, this is the same roof that was reading 146 degrees F earlier in the day, as shown in the introductory photo to this blog post. By the time I got done with the sanding, and especially after I gave it two big-time water rinses, the roof temperature had fallen significantly, but it was still warm enough to air dry quickly.
After masking the seams, I applied the primer largely using a thin 4-inch roller. I used a brush to reach into crevices such as under the edge of the roof a/c unit.
Again, I had to grit my teeth and bear it, suspending disbelief as I was applying a latex-based product over prepared metal. I worked counter-clockwise around the vehicle, pushing the paint tray ahead of me (be careful it doesn't flip off the roof in a stiff gust of wind while doing this - that would be a full-on disaster). By the time I made it all the way around, the first areas I'd painted were dry to the touch.
It's a good idea to be physically fit if you are attempting this job. I cannot tell you how many times I climbed up and down the ladder during this whole process, and on top of that, there's the need to contort the body around all those roof appurtenances. It was tiring.
 |
| View looking diagonally toward the rear, primer coat. |
Now comes the reason why I recommend you start this project in the morning.
I had intentionally timed this primer application to give it at least five hours to dry prior to the setting of the evening dew. That should have been sufficient, but we happened to have a heavy dew that night. The result is that it softened the newly-laid primer and lifted it off the metal in a few areas. I knew that this was a possibility but I thought I had allowed sufficient set time so that it wouldn't happen.
 |
| So much for my day's plans. I had been hoping to put the first layer of Bus Kote over the primer early in the day, but the primer was just too soft. That navy cloth you see there is an old T-shirt that I used to carefully sop up the worst of the dew. You can see that it took some of the primer off, chalky-like. This is one reason why I generally don't use latex products. |
In retrospect I should have either started first thing in the morning, or driven it back to its garage to spend the overnight hours in dryness following an evening application. Live and learn.
 |
| Rubbing my hand over the dewey primer produced this effect. Did I mention that I despise latex products, with or without dew? |
I should qualify that "despise" statement above. The
right elastomeric in the
right application is a tremendous asset. Years ago, I researched elastomerics within the context of house painting. I was staying at home with my baby at that time, so I had lots of time to vet products thoroughly. I did a ton of reading, ordered samples from paint manufacturers, applied the samples to my stucco house, and ultimately I special-ordered a particular elastomeric that proved to be amazing. We subsequently moved, but when I look at that house on Google Street View today, I think my original paint job might be still there, 16 years later! That kind of durability and longevity is unheard of in our Texas climate.
But the key words are
right, and
right. I don't yet know whether this combination of products, the primer and the Bus Kote, constitute the right coating in the right application. Obviously I'm obsessing over my own trepidation here.
OK, onward.
I did the roof sanding, prep, and primer on March 27, experienced my dew-related dismay sequence early on March 28, did primer touch-ups that morning and allowed that primer to harden in the sun all day on March 28. Then, I added the first coat of Bus Kote late that day, after I was sure that the primer had set properly.
 |
| It's a thick sucker. As with the primer, I recommend a 4-inch roller. |
 |
| Stir well before using. |
I put the van in our storage unit that evening (March 28) to protect it from additional dew. In fact I did that between each successive coat, allowing each of them to set overnight in dry conditions before proceeding with the next.
On March 29 we had a tremendous storm that produced 3 inches of rain, so the van remained enclosed and nothing got accomplished that day. Work resumed under the blue-bowl intensely-dry post-frontal conditions of March 30 and 31, when I added coats 2 and 3.
And here are some pics of the finished job.
 |
| I still have some touch-ups and smear-removals to do - yes, I also painted the wet bath vent cover (photo left). It still needs another coat. |
 |
| Aesthetics are not a huge concern, because the roof is almost never viewed by anyone. But aesthetically I do prefer white over the original gray. The King Jack antenna (foreground) and the Ultra Breeze Fantastic fan cover were already bright white. The diamond pattern on the solar panels was already bright white. The gray and black tank vent (upper center beside solar panels) was already bright white PVC. Everything hangs together now that the roof is also bright white. |
 |
| I left the original adhesive pads for the solar feeds on the roof and painted over them, because they were stuck on ferociously. Then I used a small pointy tool to clear the accumulated paint from the zip tie holes, and ran new zip ties through them to re-secure the lines. |
 |
| It's a challenge to get good art shots of a van roof, but this is my favorite. |
The big question is, how about performance? What results were achieved relative to that ghastly photo of the 146 degree F roof reading at the beginning of this post?
 |
| For comparable environmental conditions (time of day, sun angle, ambient air temp, and parking orientation held roughly constant), my exterior roof measurements were running in the range of 108 to 116 F, probably averaging around 112 F to 114 F. On March 31 when I made measurements following my application of the third coat, I started seeing erratic readings in the infrared thermometer because it was overheating under an unusually hot sun (we'd had a front come through, the air was very dry, and the sun was scorching). So don't take the numbers as gospel; it's probably better to regard them in rough relative terms. But there was a definite decrease in temperature. It could be felt qualitatively with the hands as well as registering on the thermometer. |
 |
| Interior ceiling temps averaged around 97 F. At the point where I had measured the 146 F roof, the interior ceiling below that spot was reading 110 F. |
So it does indeed appear that I've made some comfort gains by doing this project - which I would expect to, based on the much higher
reflectance of this roof treatment vs. the original paint. Based on that fact alone. And I may have more to say about the technological claims associated with this coating product at a later time.
In closing, I caution readers that, at this point, I have no idea how this product will either wash or wear in this application, on a sheet metal van roof as opposed to a more common RV application with their fiberglass or plywood or rubber-roofed constructions. How well the product sheds dirt and how well it ages are both critical to its performance. I'll probably edit this post going forward to comment on those factors.
Thanks for reading.
 |
| In Houston Texas, it's usually the latter. |
20170410 Edit: The Sprinter Forum thread corresponding to this post is located
here.